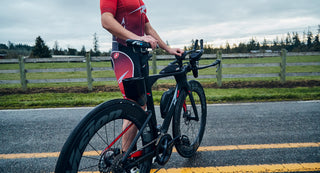
Now let's get it assembeled so you can get out on the road and start riding!
Now let's get it assembeled so you can get out on the road and start riding!
The first step is the to install the rear derailleur. The reason we decided to take this off recently is because it reduces the risk of damaging it when shipping. So it needs to be installed before the rear wheel. The rear derailleur can be installed by using a 5mm Allen key. Watch this video here (installation starts at 2:58) on how to simply install it to your bike frame.
Next step is to install the wheels so we can get the bike standing up, which makes the rest of the assembly a lot easier. To do this, we are going to take out the thru axles, put the wheel in place, and then put the thru axles back in for both the front and back. The rear wheel can be a little tricky, so watch this video here to see how it is done! And make sure to tighten it to 10 newton meters!
Now it is time to put the seatpost in. This is similar for both the Rogue and the SP, because there is a very important seatpost wedge involved (it should be located in the accessories box). The wedge is the key ingredient in tightening your seatpost into place, so it is essential for installing it the right way. Look at the video here and go to (2:16) to see how the seatpost/wedge is installed properly. Use the 4mm extended Allen key to tighten your seatpost into place.
Last but not least, it's time to set up the handlebars! Right now, they should be detatched from the cockpit. The handlebars simply need to be screwed in along with the spacers (for the SP) and faceplate; then, adjust them to your preferred angle before tightening all the way. Watch this Rogue build video here and go to (3:39) to see the handlebar installation. For the SP build video, go to (3:40) to see how the front spacers are installed with the faceplate.
If your bike build has electronic shifting, this section is for you! You need your AXS batteries to be charged and installed so you can get your groupset to be powered (they should be located in the accessories box). Simply click your batteries into both the front and rear derailleur.
Depending on what build you have, there might be some additional tasks in order to set up your bike correctly. Also located here is where you will find out how to set up your bike on a trainer!
Whether you have a Rogue or a SP, all of our bikes are compatible with most indoor trainers, as long as you have the proper thru-axle adapter. Lucky for you, we have partnered with the Robert Axle Project so you can get the right axle for your trainer. Simply visit their website, type in your trainer and A2 bike model, and find the axle that is compatible for you. Simple as that!
Our athletes love to ride with Zwift, especially in the off-season. It's also just more fun sometimes...
If you purchased an electronic shifting build from A2, you're going to need to know about the SRAM AXS app. The AXS app is connected to your SRAM components on your bike via bluetooth. It can do all sorts of things like tell you your battery percentage, tune your shifts, and have all the information on if something isn't working properly.
Watch this video here provided by SRAM on how to navigate the AXS app and all of its features.
Watch the full build videos here for the Rogue and SP. Though we ship our bikes in a slightly different way now, these build videos are the receipe to getting out there on the road as soon as possible!
If you want more information on assembling your bike or want to view some assembly FAQs, click the button below to read more. And also feel free to contact us directly if you still have additional questions.