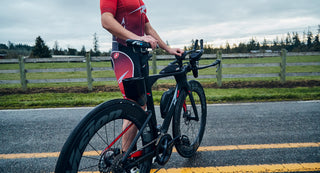
Is there anything better than new bike day? Whether you’ve picked up your new whip at your local bike shop or it’s arrived on your doorstep, the first thing you want to do is get out there and ride.
But hold up there! While the wheels may roll and the pedals may turn, it’s not a good idea to go out and log a big ride on a bike that isn't set up for your body.
A proper bike fit is essential for new and experienced riders alike. Not only do you want to be efficient and produce power, even more important is comfort. If you’re not comfortable on your new bike, those miles are never going to happen.
Not having the right bike fit can also lead to overuse injuries, a painful saddle, and just a bad time on the bike.
And while you may be able to tweak a standard commuter or road bike to make it work, a triathlon bike, which has a unique cockpit setup to attain that super aerodynamic position, is harder to adjust yourself. Even more, it requires a bit of extra knowledge from experts to get the right hip angles and setup to help you then comfortably run off the bike.
We’re here to take you through the basics, and then point you in the right direction to make sure your new bike is exactly what you need to win races and knock out personal bests.

The Bike Fit Basics
There are some elements of a bicycle fit you can do yourself. It’s likely you’ll have to address these while you’re testing bikes before making a purchase.
Bike Sizing
Getting the right size bike frame is essential. If you are stuck with a bike frame that’s too big or too small, there’s no amount of adjusting on the seat post, crank arm, or handlebars that’s going to make it work.
Your local bike shop (LBS) can help you determine the right frame size depending on brand (each bike brand is a little different). A2 will help you figure out your frame size on the product page, or you can contact us with questions. We’ll ask for your height and inseam, and what size you ride in other brands to help narrow down whether you need a S, M, L, or XL frame.
Seatpost Height
The height of your saddle is key to comfort and injury prevention. You don’t want your knees up near your chest, but you don’t want to be reaching for your pedals on every stroke either.
A simple way to get close yourself is to line up your crank arm vertically. With your foot on the pedal at the bottom of the stroke, if you can't reach it, lower the seat a bit. If your knee is too bent throughout the full crank rotation, raise the seat post a bit. Ideally, your knees will only have a slight bend in the knee. Your fitter will know the best height for you as well as the right crank length (this also may vary from tri bike to road bike, which is why working personally with experts is the best!).
Reach to Handlebars

The reach to your handlebars is essential for overall comfort and bike handling. You should feel no pain in your shoulders, elbows or wrists when you reach for your handlebars, and all positions (pads/base bars for tri and hoods/drops for road) should be comfortable with limited need to rock your hips or do any body adjustments. If you're having any numbness in your hands or discomfort sitting on your saddle (from reaching too far forward), talk to your fitter and they can adjust your stem or bar angles. For SP bikes, our proprietary SAG stem gives you the option of setting your stem at 70mm, 90mm or 110mm depending on your reach needs and without needing to spend extra money on a new stem!
Cleat Position
Cleat position will change for most people from a road fit to a tri fit, so we recommend having two pairs of shoes if you're doing both (aside from triathlon shoes also having different features such as Velcro and a heel loop strap). Typically, tri fits will feature a cleat that is a bit farther back than a road fit because of the bike geometry and need to run off of the bike. A fitter will work with you to set your cleats based on a combination of science (lining things up with key bone points) and your personal needs (taking into account things such as injuries and comfort).

Finding that Aero Position
Getting aero isn’t just about slamming the stem and staying tucked. Many elements come into play including the length and position of the aero bars, the location of the elbow pads, the height of the seat tube, and even your hydration setup.
Getting as low and tucked as you possibly can may work on the trainer for a bit, but keep in mind that if you're racing in that position for long distances, you'll have to find that middle ground between aero advantages and comfort. If your position is so aggressive that you have to sit up on your base bars often or you're wiggling around/pushing your aero helmet into the wind, you’ve completely lost the advantage of having that aggressive setup.
As you develop as an athlete, your fitness and musculature will change so your bike fit will likely change as well over the years. Increased strength and flexibility will allow you to ride in a more aero position so don’t be dismayed if you don’t look like Paula Findlay yet. It’ll come.
Where Should I Get My Bike Fit?
Now that we’ve established the need for a professional bike fit, where should you get one? There are a few options. If you're local in Portland and are picking up your bike, send us a message, and we can get you set up with a basic bike fit to make sure you're comfortable and not at risk of injury.
If you're elsewhere, check with your local bike shop. They are a great resource for all things bike related and will likely have a preferred bike fitter they use. Or, ask your bike friends!
You’ve made the investment in your bike. Now it’s time to make the investment in yourself to get the most out of your bike. Remember, a proper bike fit will allow you to ride harder, longer, and faster with fewer injuries. The wrong bike fit leads to pain, injury, and no fun on the bike.
For more information, we also love this video from Global Cycling Network on road bikes:


